Configuration Groups
Configuration Groups was created in v 20.9.x, this is due to the lack of flexibility in feature Tempates. With Feature Templates you could assign them to different devices but lacking the flexibility. Now with Configuration Group (image below from Cisco Site) you can essentially create a Group which consists of Feature Profiles that allows you to mix and match for each device. Features allows the user to add/remove such as MPLS, LTE or Internet under the Feature Profile WAN.
Example below is if you had a group of devices and within a region, they required the same Feature such as Loggin and Banner, you could share the same Feature Profile but in a separate Configuration Group. Likewise you could just create one Feature Profile with Features under the same Feature profile for one set or group of devices.
Example below shows :
- Feature Profile – Transport Profile 1 – Only West Coast Configuration Group devices is using it.
- Feature Profile – System Profile – Logging and Banner Features is being used by West Coast and East Coast but in 2 different Configuration Group.
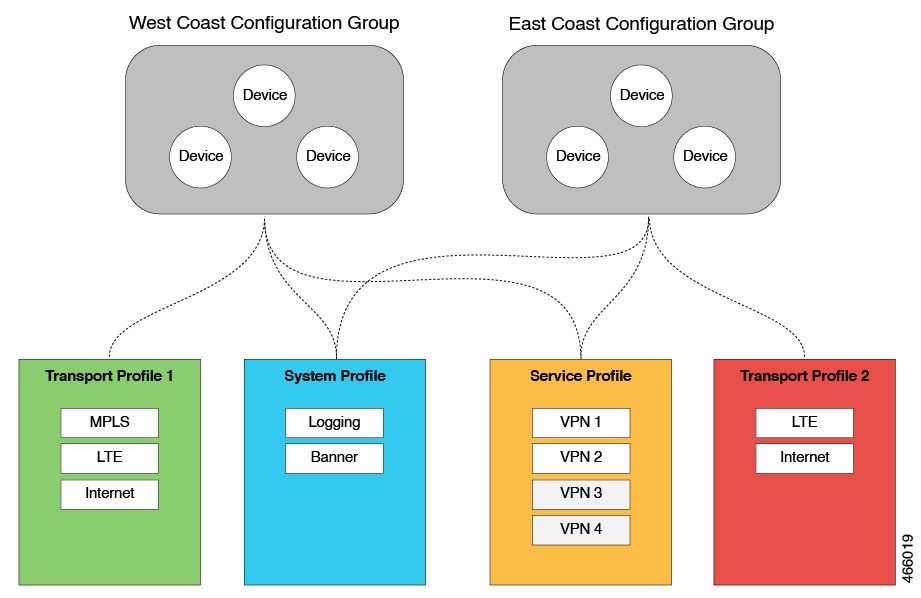
Transport Profile = Colour or the transports you will be using such as MPLS, Business Internet, and which VPN it is under (0 Transport or Management 512).
System Profile = Consists of AAA, Banner, BFD, Logging, NTP etc
Service Profile = Consists of the Overlay Servive VPN like 1-500 etc
When you choose which Features to add into the Feature Profile this is called ‘Parcel’. So if you wanted to setup Logging you would include the logging Parcel into the System Profile (Feature Profile).
From Cisco Website – Definitions
The Configuration Group feature provides a simple, reusable, and structured approach for the configurations in Cisco Catalyst SD-WAN.
- Configuration Group: A configuration group is a logical grouping of features or configurations that can be applied to one or more devices in the network managed by Cisco Catalyst SD-WAN. You can define and customize this grouping based on your business needs.
- Feature Profile: A feature profile is a flexible building block of configurations that can be reused across different configuration groups. You can create profiles based on features that are required, recommended, or uniquely used, and then put together the profiles to complete a device configuration.
- Feature: A feature profile consists of features. Features are the individual capabilities you want to share across different configuration groups.
Restrictions for Configuration Groups
- You can associate a device to either a configuration group or a device template, but not both.
- You can add a device to only one configuration group.
- You can add only one tag rule to a configuration group.
- (Minimum supported release: Cisco Catalyst SD-WAN Manager Release 20.12.1) You can only apply the dual device configuration group to a site with two or less devices. For additional devices in the same site, use a single device configuration group.
Deploy Cisco SD-WAN Devices Using Configuration Groups
As a minimum, you need system and transport Profiles to be setup in order for Config group to work.
In my previous blog I wrote about Configuration Groups, this session I will demonstrate how to configure Config Groups.
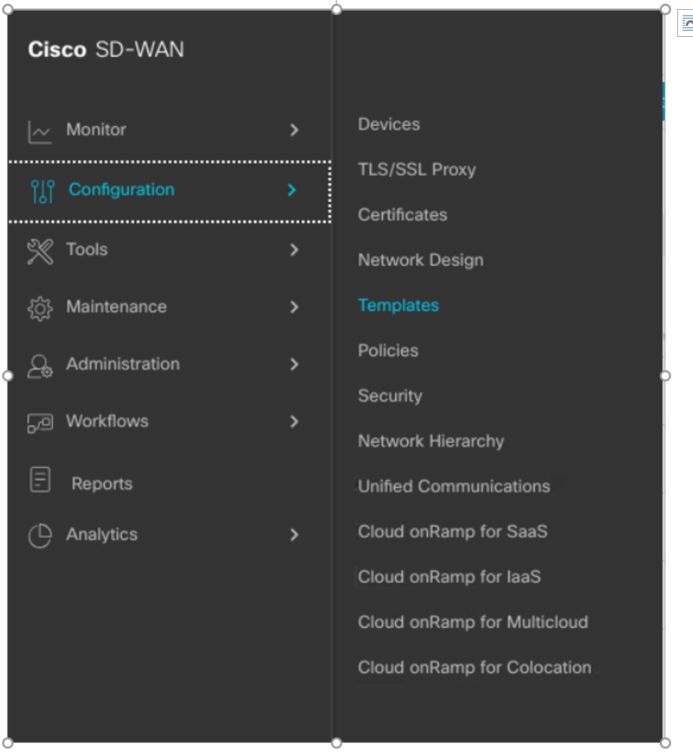
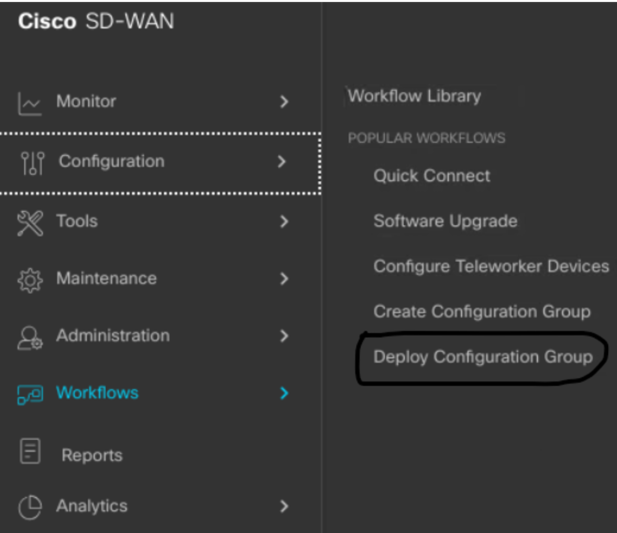
Click on Configuration > Templates

Add Configuration Group

Click Create Configuration Group

As usual give the Config Group a name and this time Config Group Description is now Optional.
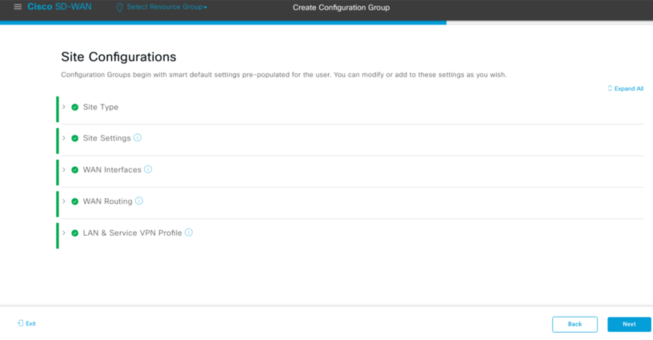
This is where you begin to configure your config group. For this example I have skipped the Site types – Site Types give you the option if it were dual connectivity etc.
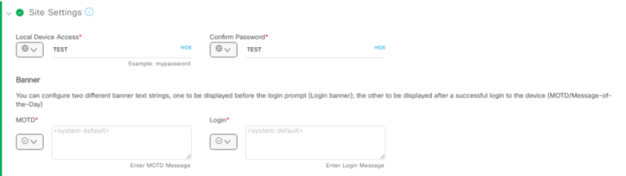
With Site Settings you can configure a password for either or all devices.
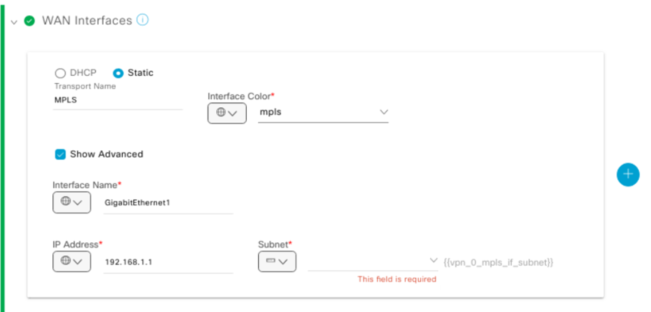
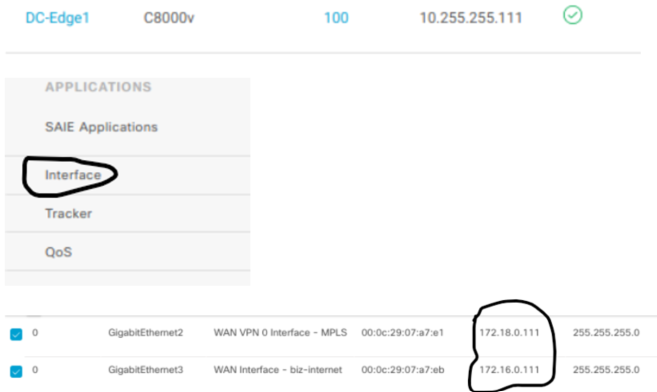
WAN Interfaces allow you to configure your VPN0 transports. So you can add the Colour, whether it is Static IP, interface it is connected at VPN0 and the IP address of the interface. Think of this part as the Templates where you create a VPN Interface template then a VPN template but instead you can do this in one go. Exactly why this is a lot quicker and smoother method than traditional Templates.

You can then add the WAN routing whether you want static IP or running a Routing Protocol. In this example I used a static default route and chose which interface (GigabitEthernet1) and the IP address of that interface. You also add the next hop of the neighbouring router.
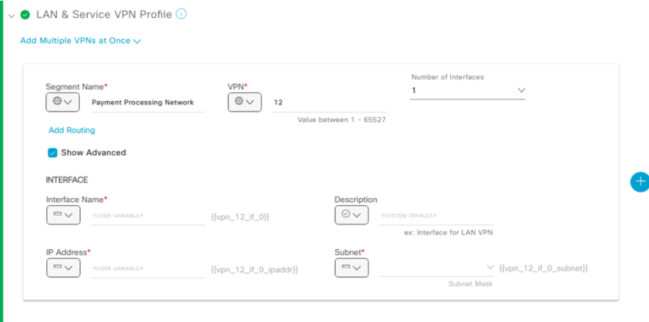
On this Section – You configure the Service VPN, which includes the interface it will belong to and the IP address/subnet. Now prior to v20.8.x, you still had to create a template. In this example, you will need to create a VPN interface, VPN template. Now you can configure this in one go.
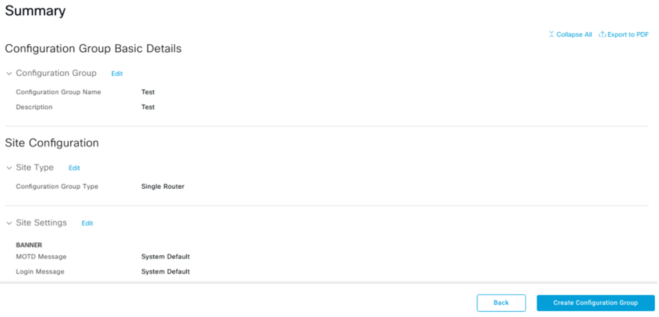
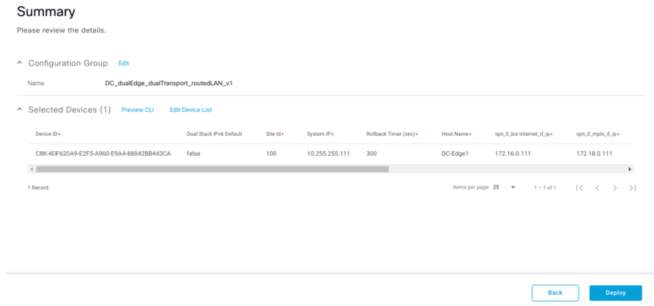
Once done you can go ahead to create a Config Group.
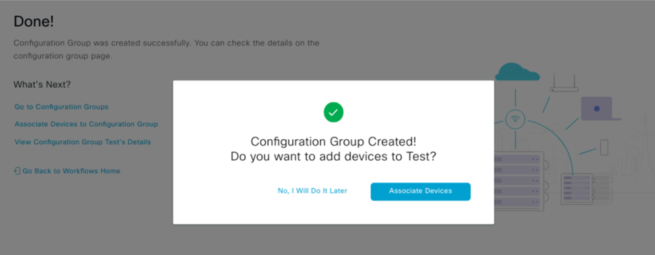
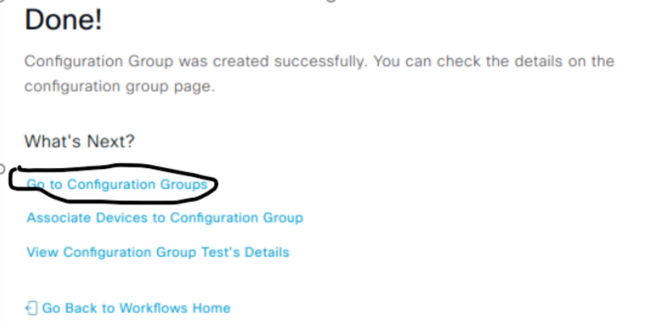
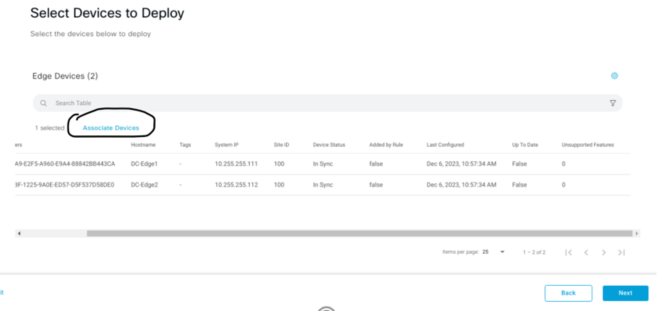
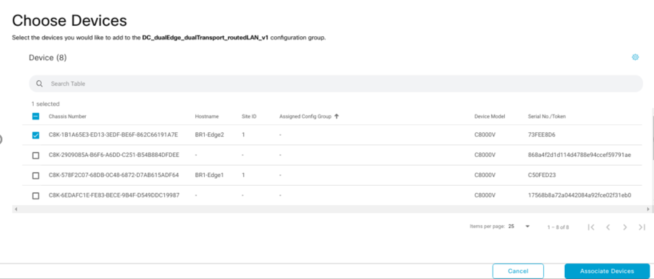
Now the Config Group is complete, you can now attach devices to this config group.

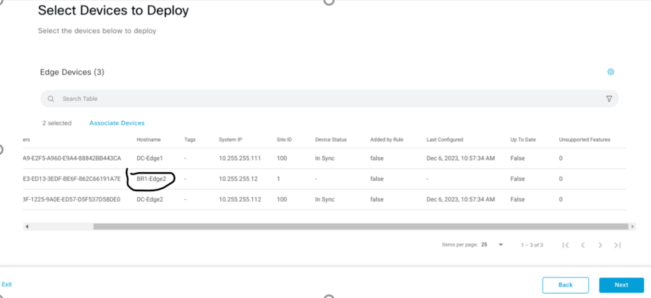
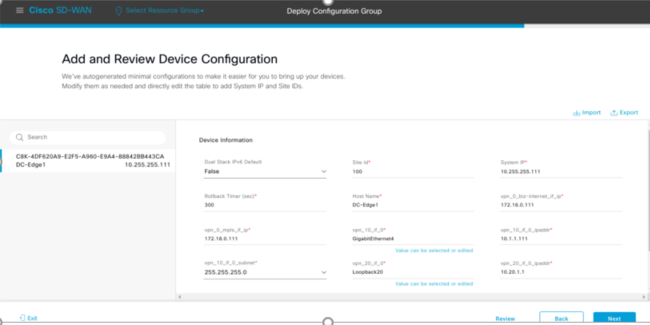
Once you have attached your device, this is where you fill in the Variable Parameters which you have set as Device Specific.
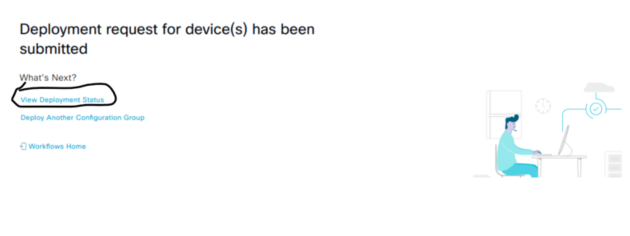
Once you have deployed this Config Group you can check the status of it.
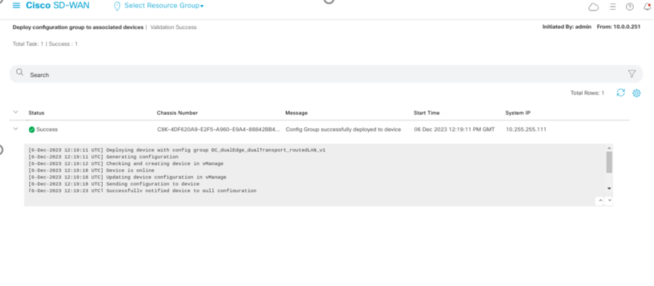
In theory, this should be Success with a Green Tick!
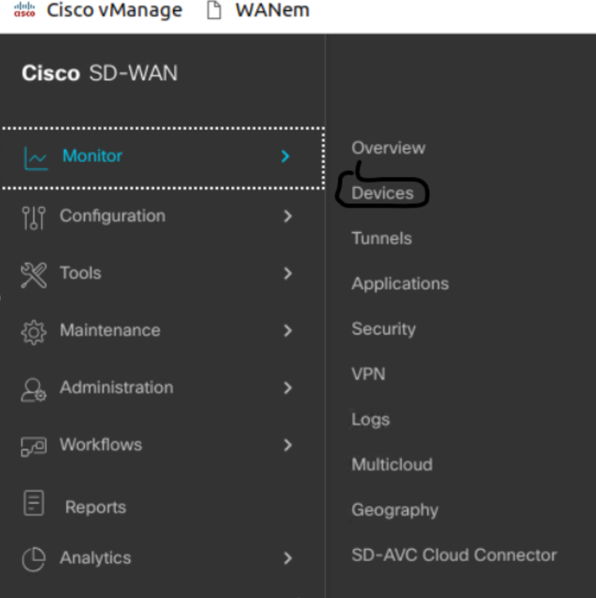
Now to check if the changes you made have been successful and applied the config, go to Monitor and Devices.
A Feature profile is where you attach profiles to a Config Group. Feature Profiles are similar to Feature Templates but instead you can configure multiple feature Parameters into a profile. An example is under the System Profile – you can configure AAA, MOTD Banner etc and all go into the same Feature Profile. Previously without Config Groups, you’d need to create multiple Feature Templates, so if you wanted a Banner, you would need a Banner Template, same for AAA etc.
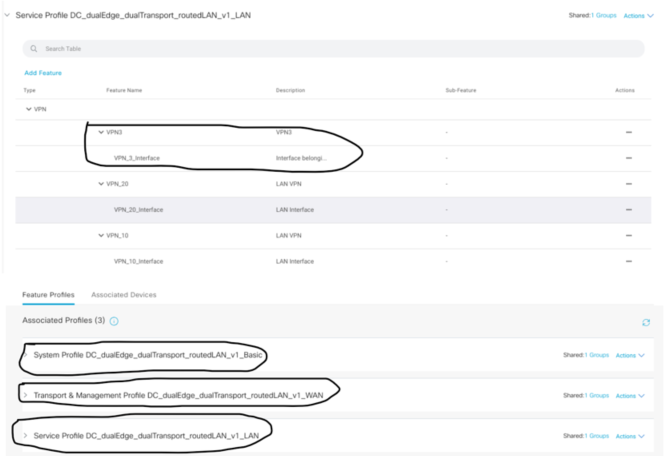
Under the Config Group you can edit this so in this example you can see what Feature profiles have been attached already. In this example I have already created a VPN 20 and 10. Now I’d like to create another VPN 3 for Guest however the Config Group and Feature Profiles have already been configured so I will Edit the Config Group and in the Service Feature profile.
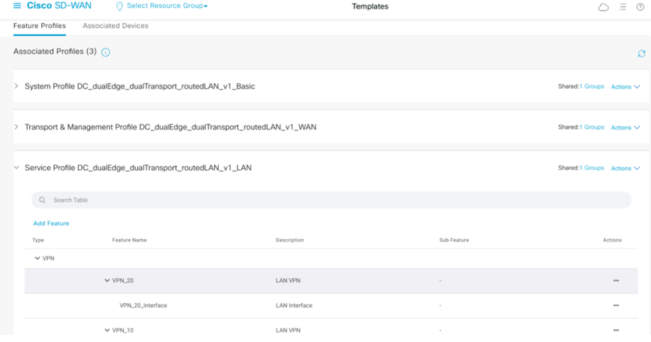
As you can see I have only VPN10 and 20 with the interfaces created that belong to the specific VPN. Just click Add Feature to begin with.
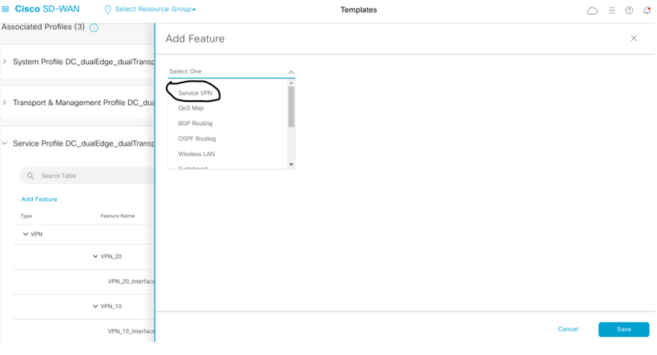
Select Service VPN.
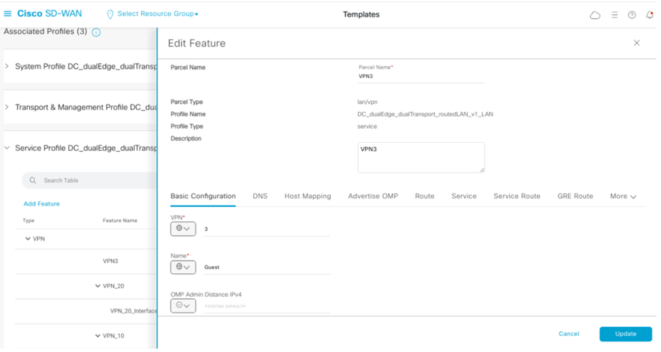
This is where you can then configure the VPN.
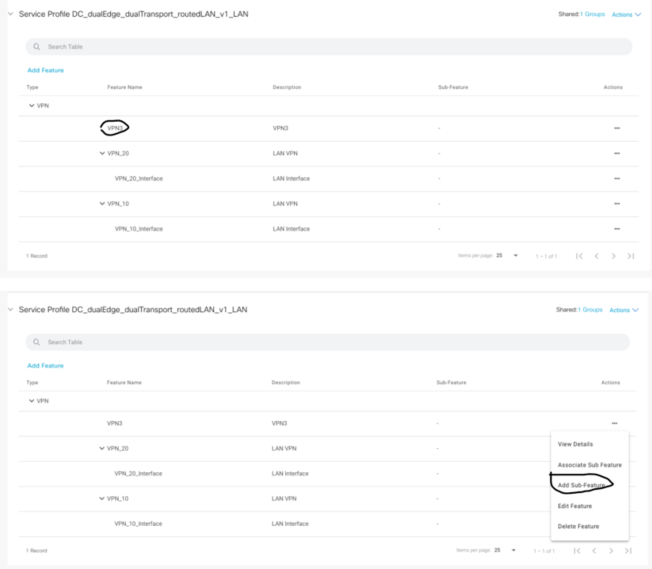
You then Add a sub-feature where it will be equivalent to your VPN interface template.
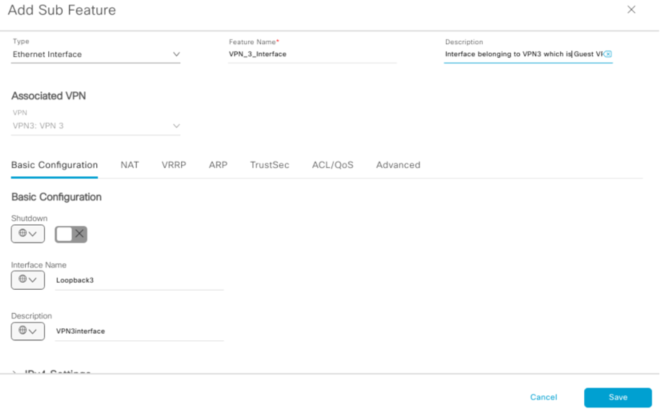
I’ve configured a loopback interface which belongs to VPN3.
In this example I have only used 3 Feature Templates.
I have included the other Feature Profiles, as an example you can create other Feature Profiles.